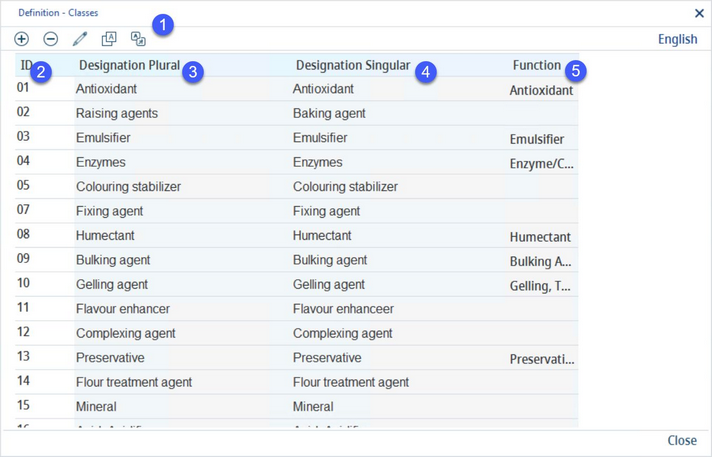
Additive classes are used in the Trade definition to classify ingredients belonging to the group of food additives. Some additive classes have already been saved in SpecPDM and contain detailed information (currently only in German).
1)Add: Insert new additive class.
Delete: Delete selected class.
Edit: Modify selected class.
Language: The language selection list.
Translate: Translate details of additive classes.
2)ID: The unique identification number.
3)Definition plural: The class name in plural.
4)Definition singular: The class name in singular.
5)Function: The corresponding function of the additive class in Decernis gComply Plus. For more information see Recipe → Functions & Processes → Compliance Guide.
Close: Close the dialog.
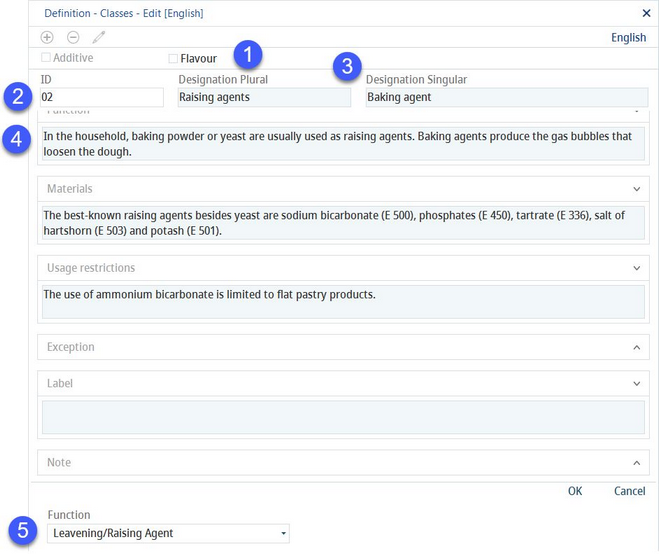
Editing Classes
1) Additive: This button has no longer an active function.
Flavour: When this checkbox is selected, the trade name with this class assigned is treated as a flavoring component.
2)Class description: Use these fields to provide more information about the class. Any of the fields can be left blank.
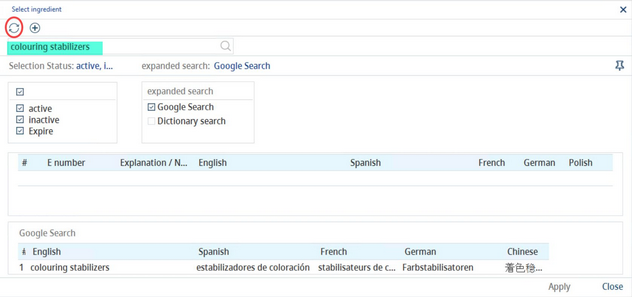
3)To change/create a class name, click the Description Plural or Description Singular field to open the ingredient selection dialog. Type the new name in the Search term field and click on Refresh.
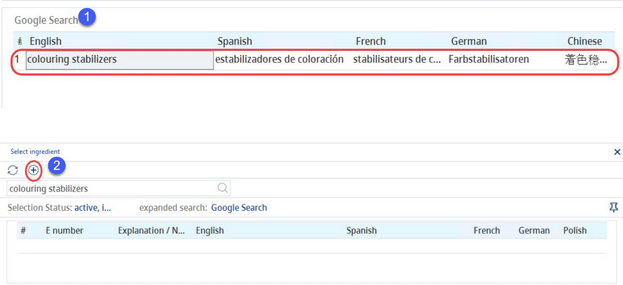
Now, the system will either display a matching trade name, in case it exists (labelled 1), or offer to create a New trade definition (labelled 2). Double-click on the existing trade name or create a new trade name. In both cases, the trade name will be applied as the new additive class name.
4)Class description: Use these fields to provide more information or explanation.
5)Function: The corresponding function of the additive class in Decernis gComply Plus. For more information see Recipe → Functions & Processes → Compliance Guide.
Translating Additive Classes:
To translate a class name, use editing (see more information above). To translate class details, click on the Translate ![]() button in the Classes main dialog. Since class names are not visible and all classes are included in the Translate dialog, it is necessary to use the ID to locate the correct class to translate.
button in the Classes main dialog. Since class names are not visible and all classes are included in the Translate dialog, it is necessary to use the ID to locate the correct class to translate.
1)Language: The language to be translated.
2)Each section of the description is displayed both in the source system language (in this example English) and in the target language (1). Translations are to be entered in the target language sections.
3)Commit the selected text to system language: Right-click option; the selected target language text will be overwritten with the system language text. This option is available only in the source language columns.
Commit all texts to system language: Right-click option; all target language texts will be overwritten with the system language texts.
4)Save: To save translations.
Close: To close the dialog.


