It is possible to attach files, such as images, certificates, laboratory results, etc., to various objects in SpecPDM. The procedure is always identical:
When the Documents dialog appears, choose how you would like to assign the document. Right-click and select one of the options:
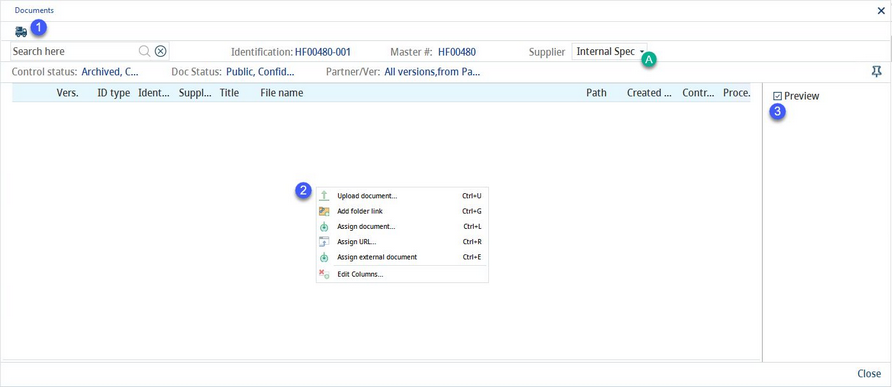
1)Supplier: Click this button to reveal the supplier selection list (labelled A).
2)Right-clicking in the Documents section of the screen brings up the following context menu:
Upload document: Attach a file to your project in SpecPDM.
Add folder link: Insert a link to a folder.
Assign document: Assign a file which will not be uploaded to SpecPDM, but will be stored locally.
Assign URL: Type a URL that will open in your default web browser on double-click.
Assign external document: Enter information about a file that is not directly accessible.
Edit columns: Show or hide columns. It is also possible to rename columns by double-clicking on their name.
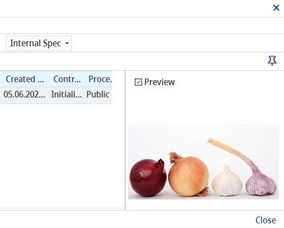
3)Preview: Mark the checkbox to display a preview of the document. These previews may be in the form of pictures or document names and file types.
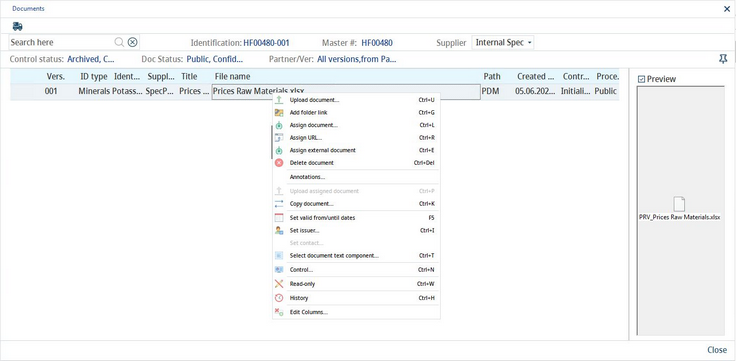
When you have already uploaded at least one document assigned/uploaded to your project, the following extra options will be displayed in the right-click context menu:
Delete document: Remove the selected attachment from your project.
Upload assigned document: Upload the assigned file (see above) to SpecPDM.
Copy document: Make a copy of the file. This requires a new file name.
Set valid from/until dates: Set the validity of the document from a calendar.
Set issuer: Select an issuer from Administration → General → System Settings → Partner structure.
Select document text component: Select a text component in the column Comment. See General Information → Using Text Components for more information.
Control: Change the statuses of the file. You can learn more about data control in the article Introductions and conventions → Data → document control.
Read only: Disables certain editing options (e.g. deletion, validity, etc.).
History: View the history of detail changes of individual attachments.
|
Important: If you do not see the attachment you have uploaded in the list, you may first need to check if the Statuses filter on the left side of the window is adjusted correctly. |


