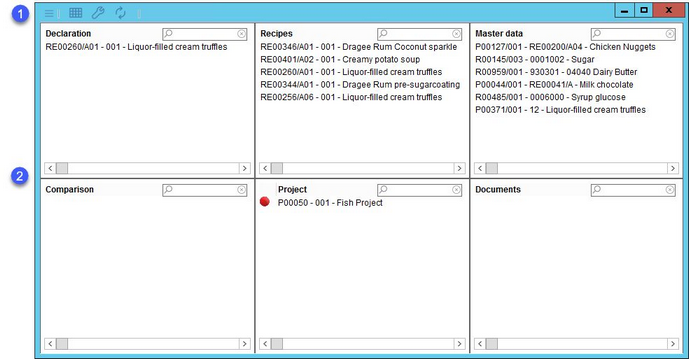
The Home Screen module provides an overview of all recently opened records in each module and customized arrangement options, as well as grid configuration settings. The home screen is divided into two separate parts - the quick access toolbar (1) and grid (2). The quick access toolbar accommodates the necessary home screen configuration tools. The grid allows for a quick access to the recently opened records.
Setting up the Home Screen
The Home Screen module is blank by default and needs to be customized by each user individually via these configuration icons:
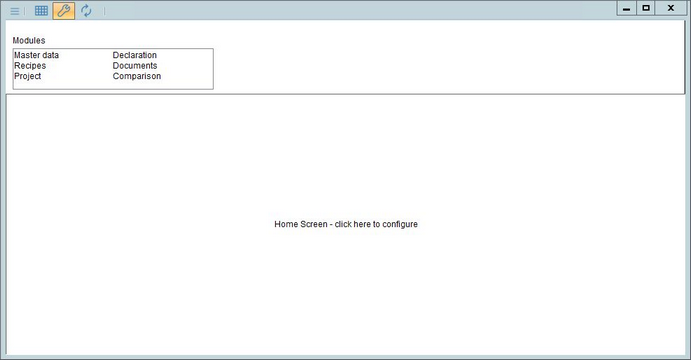
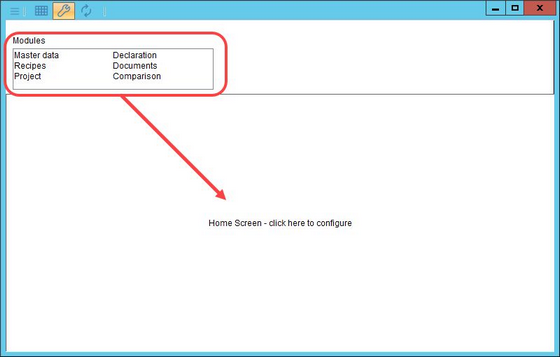
1.In case of accessing the home screen for the first time or resetting your configurations, a message saying: "Home Screen – click here to configure," appears on the screen. The user may use this instruction link or the wrench icon ![]() to activate the module list. The number of cells need to be defined upfront to create empty cells for the individual modules. The selected module is to be dragged to the corresponding cell.
to activate the module list. The number of cells need to be defined upfront to create empty cells for the individual modules. The selected module is to be dragged to the corresponding cell.
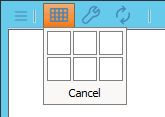
2.Click the grid icon ![]() and drag the cursor over the table gridline to configure the number of cells for individual modules to be displayed in the home screen view.
and drag the cursor over the table gridline to configure the number of cells for individual modules to be displayed in the home screen view.
3.Initially, only the names of the selected modules appear in these cells and will be gradually filled up with recently opened data objects per module. Move the cursor over the selected record and simply click on it to directly open it.
The wrench icon ![]() also acts as a hide/unhide button of the module listing dialog window. The maximum number of rows for the listed records is limited to 9 recently opened results, if the wrench icon
also acts as a hide/unhide button of the module listing dialog window. The maximum number of rows for the listed records is limited to 9 recently opened results, if the wrench icon ![]() is ON. If turned OFF, the number of rows is listed in the view. In this case, the number of rows can be specified by the system administrator using a designated program parameter.
is ON. If turned OFF, the number of rows is listed in the view. In this case, the number of rows can be specified by the system administrator using a designated program parameter.
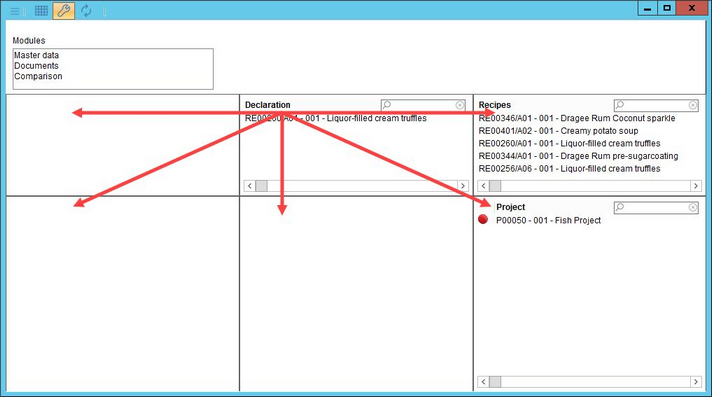
4.In order to configure a customized home screen view, click and drag and drop the selected modules to the target cells.
5.The modules can be allocated, as required, by clicking the title of the module and dragging and dropping it to any direction horizontally, vertically, or diagonally. If the target cell already contains a module, they will switch positions.
Records Synchronization
The reload/synchronize ![]() button resubmits and reflects the actual data in case of changes performed in these records.
button resubmits and reflects the actual data in case of changes performed in these records.

Search Function
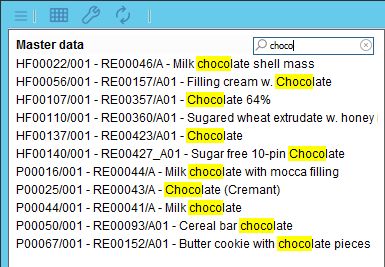
The module also features an integrated, partial-name search function requiring only partial string entry. By clicking on the record, you will be redirected to it. The ![]() icon clears the search and restores the previous showcase of recently opened records. In the cells with Master data objects and recipes, you can also search according to the object's Master data ID, respectively recipe ID, and the ERP number (the field containing this number is called Master no. in both Master data/Definition and Recipe/Definition).
icon clears the search and restores the previous showcase of recently opened records. In the cells with Master data objects and recipes, you can also search according to the object's Master data ID, respectively recipe ID, and the ERP number (the field containing this number is called Master no. in both Master data/Definition and Recipe/Definition).
