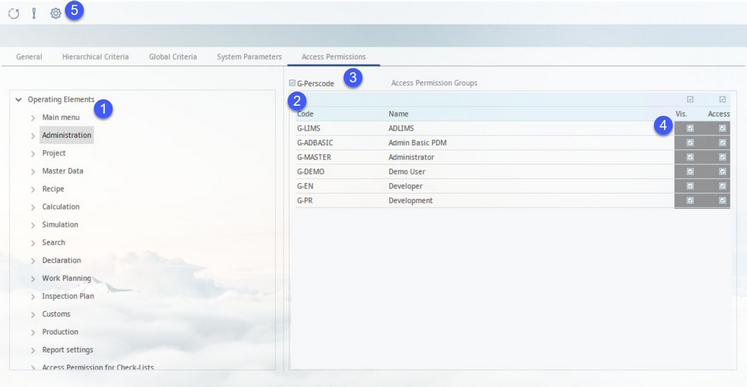
Via the Access permission tab, access permissions for the predefined permission groups can be created and modified specifically for each operating element and function. Each user of SpecPDM can have multiple permission groups assigned to them, and thus be granted access permissions according to these groups.
1)Function/element selection list.
2)List of permission groups.
3)G-Perscode: When this checkbox is selected, all permission groups are displayed. When deselected, the permission groups with the Permission group checkbox marked in their profile are excluded from the list of displayed access permission groups. See below for more information.
4)Grant permission to individual groups.
Disabled: The feature is not visible.
Visible: The feature is visible but cannot be used or modified.
Access: The feature is fully usable.
5)Module Toolbar
A. Refresh: Refreshes the selection list view.
B. Manage access permission groups.
C. Licensing information.
Managing Access Permission Groups
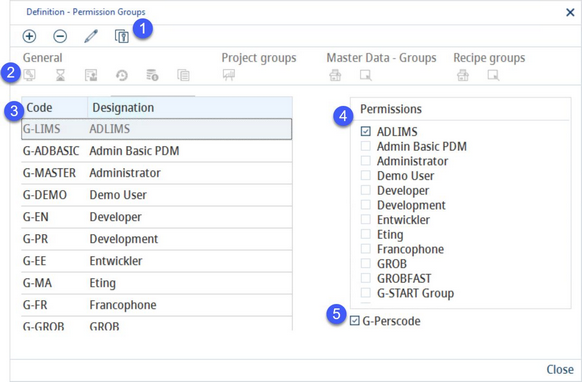
Click on ![]() (in the Module Toolbar) to display the Definition - permission groups dialog.
(in the Module Toolbar) to display the Definition - permission groups dialog.
1)Insert: Use this button to add a new permission group.
Delete: Use this button to delete a permission group.
Edit: Click this button to modify existing permission group Designations.
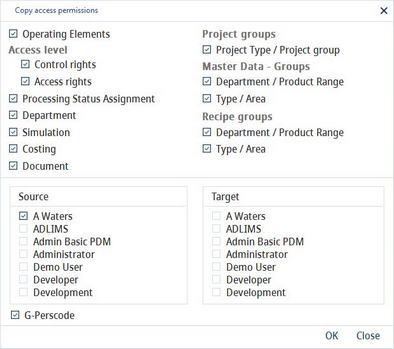
Copy access permissions: Select the type of access permissions to copy and select the Source group and Target group(s). Click OK to copy the access permission settings.
2)Overview of permission groups: This view is read-only by default. To edit this section, click on the Edit button.
3)Each access permission group has its unique code and description. The list contains also 8 permission groups used specifically for the Project module. For more information, see Project → Functions & Processes → Project Permissions.
4)Permissions: The list of permissions that are represented in the Designation column of the left panel (labelled 3). If a user clicks on the Designation to the left, its respective checkbox will be marked. This view is read-only by default.
5)G-Perscode: When this checkbox is selected, all permission groups are displayed. When deselected, the permission groups with the Permission group checkbox marked in their profile are excluded from the list of displayed access permission groups. See below for more information.
Creating a New Access Permission Group
1)To create a new access permission group, go to Administration → Access level and click on the exclamation mark icon ![]() .
.
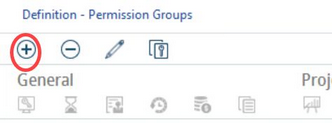
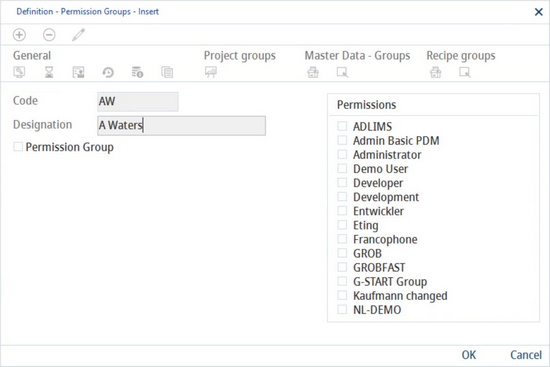
2)Click on Insert.
3)Enter the custom group code and designation (name). Select the Permission group checkbox if you want to include this group in the list of personal groups that displays whenever the G-Perscode checkbox is selected.
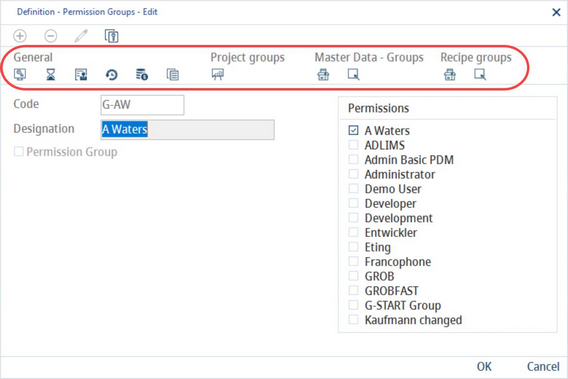
4)To set up specific permissions, save the newly created group by clicking OK in the main dialog and then click Edit. Individual permission types can now be specified for the particular group (circled below).
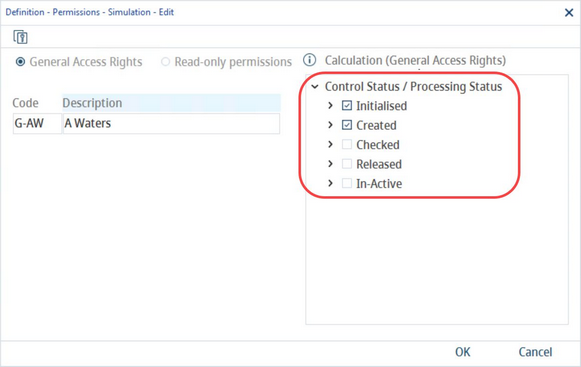
5)Select the permission type you want to edit (e.g. Simulation) and use check marks to grant access to specific elements. Click OK to save. You can also switch between general access rights and read-only rights, but only when outside of the edit mode.
Assigning Permission Groups to Users
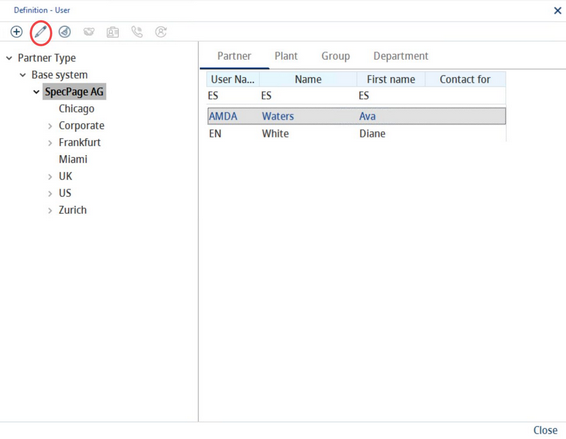
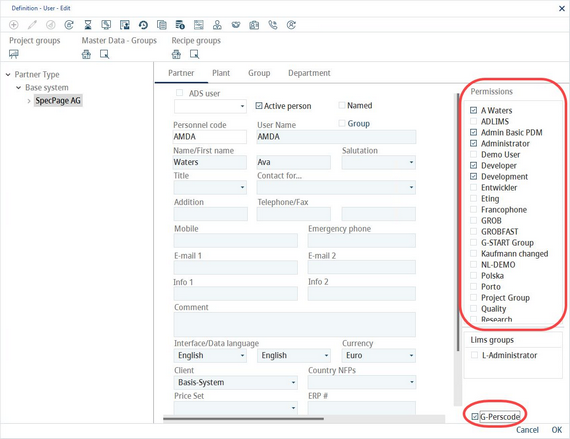
1)To assign access permission groups to users, go to Administration → General → User Settings → User.
2)Select the user from the list and click Edit.
3)Select which access permission groups will be assigned to the user. Mark the G-Perscode checkbox to display all available groups. Then click OK to confirm.
