If you wish to manage labels, you can select the Label reporting type from the main selection window. After choosing this option, the PDM Labels dialog opens.
1.Provider: Select a provider from the list of available providers related to the Master data object.
2.Label: Select a label from the list of available labels.
3.Manage DB labels: Select this button to manage existing labels or create new labels. This option is further described below.
4.Preview: Preview the selected label.
Print: Print the selected label.
Cancel: Exit the dialog.
|
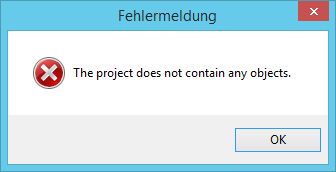
Note: In case the selected label does not contain any relevant information, the following notification window will be displayed: |

Managing Label Database
If you wish to create, edit, or delete labels, select the Manage DB labels button from the PDM Labels dialog.

By selecting this button, the following dialog opens:

1.Label: Select from a list of already existing labels.
2.New: Create a new label. Selecting this button will open a new application. This option is further explained below.
Copy: Copy the selected label and create its duplicate with a new Name and ID.
Edit: Edit the selected label. Selecting this button will open a new application shown below.
Delete: Delete the selected label. You will have to confirm this deletion.
3.Other settings.
Configure barcode: Define barcode properties. This option is further explained below.
Advanced print settings: Define print settings. This option is further explained below.
Close: Closes the dialog.
Creating and Editing Labels
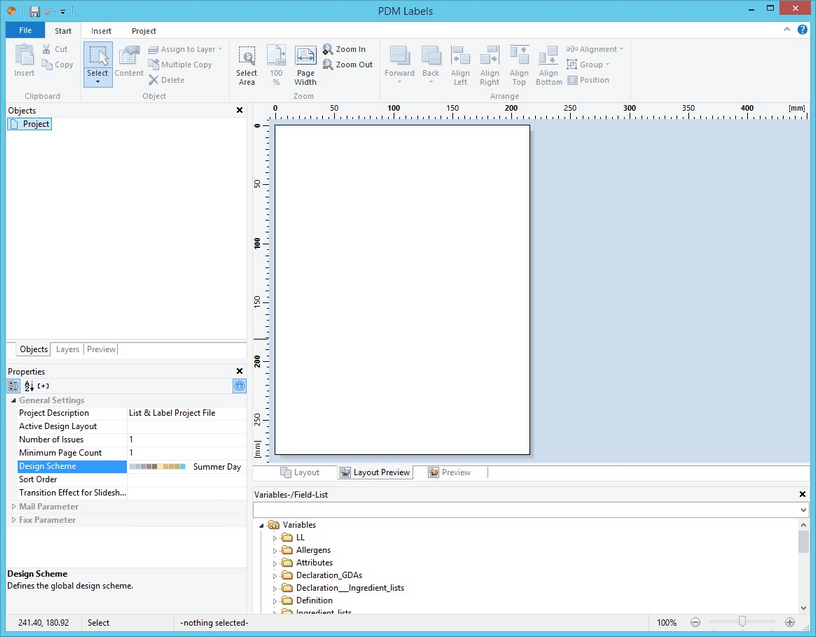
Whether you wish to create a new label, or edit an existing one, you will need to use the List & Label® application.
To see a detailed manual, you can also follow this link to List & Label® Version 22 Designer Manual. If you use an older version of the List and Label® application, you can access your local manual by pressing F1.
Configuring Barcodes
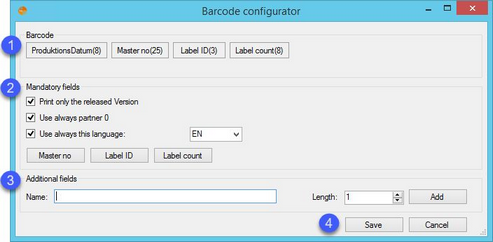
Selecting the Configure barcodes option from the DB label management dialog will open the following dialog:
1.Barcode. A list of available barcodes. The number shown in parentheses indicates the character length of the field shown on a barcode. A new field may be created in Additional fields (4). You can also click and drag the existing fields to change their position.
2.Mandatory fields. Print only the released version: Check this field to print only the released version of the Master data object.
Use always partner 0: Check this field to use the predefined zero partner.
Use always this language: Select a language that will be used for the report. Leaving this option unselected will print the report in multiple languages.
3.Additional fields.
Name: Type a name for the field that will be shown in the Barcode section.
Length: Select how long the character length for the created field should be. Press Add to add it to the Barcode section.
4.Save: Save changes.
Cancel: Cancel changes.
Advanced Printing Settings
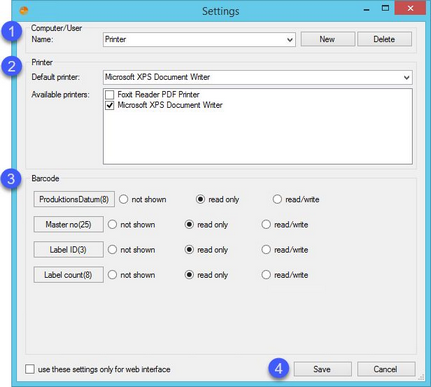
Selecting the Advanced Print Settings option from the DB label management dialog will open the following dialog:
1.Computer/User: Select the name of a user or the computer name to whom the settings will be applied. You may create new profiles or delete existing ones by selecting the buttons New and Delete, respectively.
2.Printer.
Default printer: Select one of the available printers to be set as default.
Available printers: Select from the list of available printers which one will be used to print the report.
3.Barcode: This section corresponds to the one above, with fields that have already been created. Select one of the radio buttons to allow the selected User/Computer to either not (be) shown, read only (may not be edited by the selected User/Computer), or read/write (may be edited by the selected User/Computer).
4.Save: Save changes.
Cancel: Cancel changes.


