This sub-tab contains general information about forms.
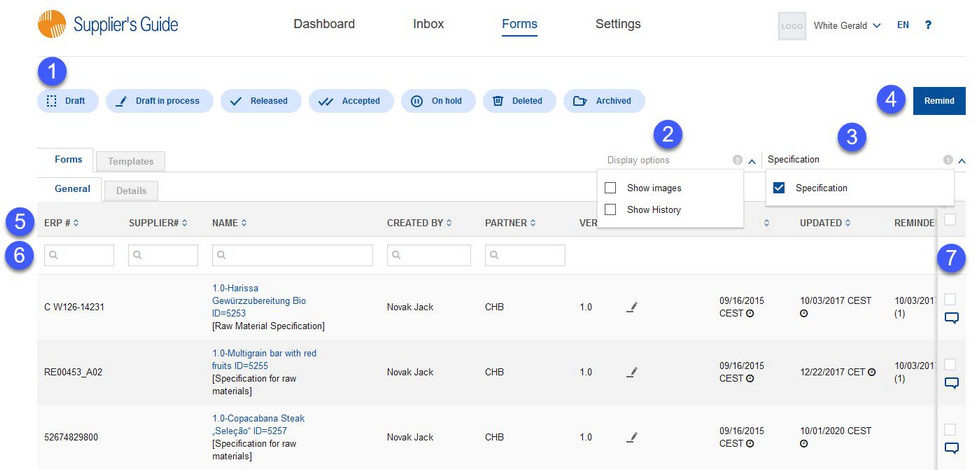
1)Processing status: Filter forms according to their processing status. To learn more about individual statuses, see article Processing status.
2)Show images: Select to display images in the table with forms.
Show history: With this option enabled, you will be able to see not only the latest version of each form, but also all the previous versions.
3)Form types: Filter the forms according to their type.
4)Remind: Send email reminders for the selected forms (see point 7).
5)Forms:
•ERP#: Your material number (SAP, PDM, ERP).
•Supplier#: Material number of the vendor.
•Image: Image preview. Images must be enabled via the Show images checkbox.
•Name: Name and type of the form.
•Created by: User name of the creator of the form.
•Partner: Business name of the vendor (under which he registered on the portal); the name of your partner you sent the form to.
•Ver.: Version of the form.
•Status: An icon indicating the status of the form is shown.
•Down: Indicates whether the form has already been downloaded, or not. If not, the column stays empty, if applicable, it will contain an icon.
•Created: The date on which the form was created.
•Updated: The date on which the form was updated, i.e. the status of the form changed.
•Supplier: This column contains information about the recipient of the form. In case the recipient is not registered with any company, it contains their email address.
•Reminders: Indicates whether a reminder was sent to the vendor. The date on which the last reminder was sent, as well as a counter indicating the number of reminders already sent is displayed.
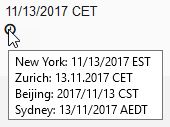
Note: In columns Created, Updated and Reminders, you can place your mouse pointer on the clock icon ![]() to see the date in 4 different timezones/formats.
to see the date in 4 different timezones/formats.

6)Search: Search within individual columns. Partial words are supported.
7)To send reminders, use the checkboxes on the right panel to select users to be reminded (use the top checkbox to select all). Then click on the Remind button.
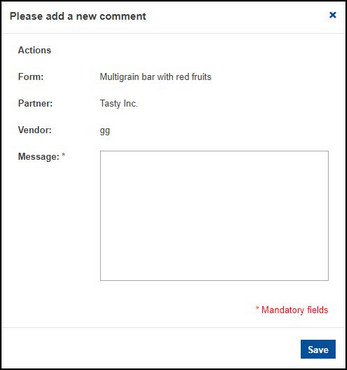
When you click on the speech bubble button ![]() on the same panel, the following pop-up window opens:
on the same panel, the following pop-up window opens:
Type in your comment and click on Save. The vendor will see the form in their inbox.
By clicking on the forward icon ![]() , you can forward an already filled out form from one vendor to another
, you can forward an already filled out form from one vendor to another

