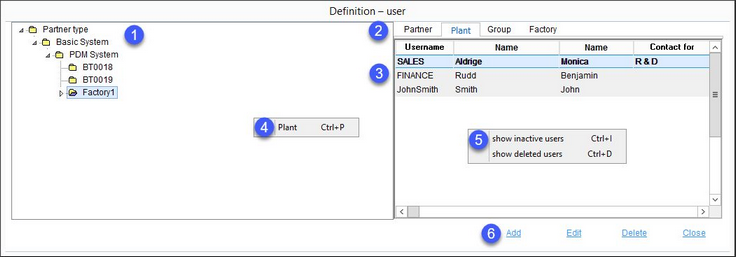
In the Administration/General/User dialog, you can create and manage SpecPDM users. Users are treated as contact persons for the Base system and thus some of their details can be also managed via Administration/General/Person. Every user must be assigned to at least one particular permission group.
1.Partner structure: A hierarchical view of the partner structure. Select a partner from this list to see all assigned uses. Only the base system and its sub-divisions are displayed.
2.Partner type.
3.Users: A list of all users created for the selected partner.
4.Right-click in the user section and select show inactive user or show deleted user to display inactive or deleted users along with all active users.
5.Plant/Group: Right-click in the product structure and select Plant or Group to open the Administration/General/Partner structure dialog.
6.Add: Create new user.
Edit: Edit selected user.
Delete: Delete selected user.
Close: Close the dialog.
Editing User Details
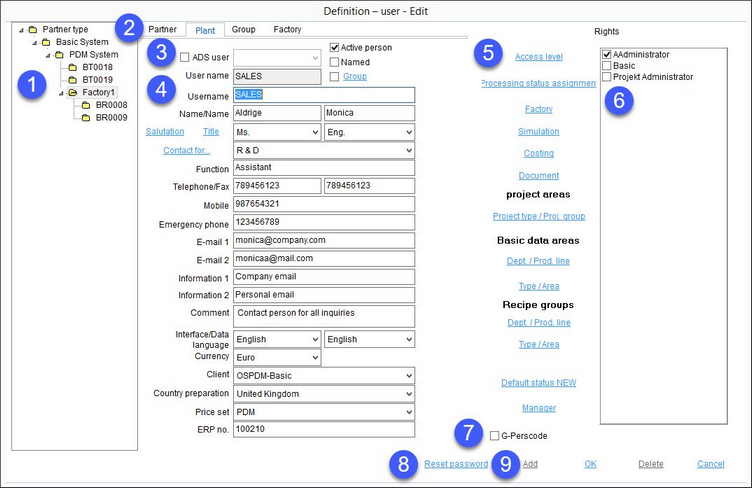
1.Partner structure: A hierarchical view of the partner structure. Select a partner from this list to see all assigned uses. Only the base system and its sub-divisions are displayed.
2.Partner type: See description above.
3.Checkboxes:
ADS user: Active user of Adobe Document Services.
Active person: Unselect this checkbox to mark the user as inactive. Inactive users are not allowed to log in to SpecPDM.
Named: The user is linked to a named license type.
Group: Turn the user into a pseudo-group - this user can contain sub-users. This is used in the Project module, where this group can be assigned as owner/deputy and later a specific user from the group can be selected.
4.Contact details:
User name: The automatically generated identification number.
Username: The SpecPDM login name. The same special characters that are used for creating user names in Windows are allowed.
Name/Name: The surname/first name of the person.
Salutation/Title: Click on the blue button to edit the selection list with available salutations or titles. It is also possible to provide translated versions of salutations and titles.
Contact for: Specify the department or main responsibility. This selection list can be further adjusted by clicking on the blue button. It is also possible to provide translated versions of salutations and titles.
Function: Job title or any other additional information.
Telephone/Fax/Mobile phone/Emergency phone: The phone/fax numbers.
Email 1, Email 2: The main and alternative e-mail addresses.
Information 1, Information 2: The supplementary contact information.
Comment: Enter a comment about the person.
Interface language: The language of the SpecPDM interface (i.e. the application language).
Data language: The default data language setting. The language can be changed via the language selection list available in the top-right corner of most modules and tabs. However, it will be set back to default after next login.
Currency: Selected currency will be used as the default currency (e.g. in recipe costing).
Client: The Client selection list.
Country preparation: The country that will be preselected for Guideline Daily Amounts (in modules Master, Calculation and Declaration).
Price set: The default price set of the user. Price sets are relevant in recipe cost calculations.
ERP no.: The Enterprise Resource Planning number associated with the user.
5.Access options: Click on the blue button to see user-specific access permissions granted to the user according to the assigned permission groups. These access options can be only viewed. Their modification has to be performed via Administration/Access level for individual access permissions groups.
6.Permission groups: The user must be assigned to at least one permission group. For more information, see Administration → Access level.
Default status: Select the default processing statuses for objects newly created by the user (e.g. Master data records, projects, recipes, etc.).
Manager: Defines for which other users you will act as manager. This is used in salesperson functionality, where the access to project/recipe/Master data can be limited only to specific salespeople (also via linked projects).
7.G-Perscode: Select this checkbox to display all permission groups including those with the Permission group checkbox selected in their profile.
8.Reset password: Change a user's password. More information can be found below.
9.Add: Inactive when editing a record.
OK: Confirm changes
Delete: Inactive when editing a record.
Cancel: Close dialog.
Creating and Resetting User Password
Creating a Password
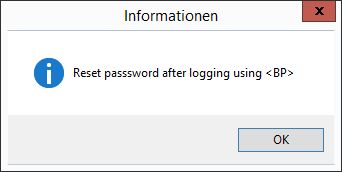
1)When a new user is created, their Username will be used as the login name and a one-time password will be provided in a message:
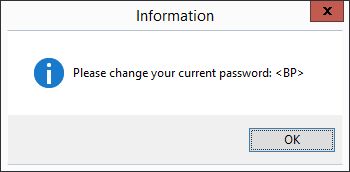
2)When you log in using the one-time password, the following message displays:
3)When confirmed, the Change password dialog opens. Click outside the data-entry fields to display predefined password requirements. Password requirements can be specified via Administration/General/Password.
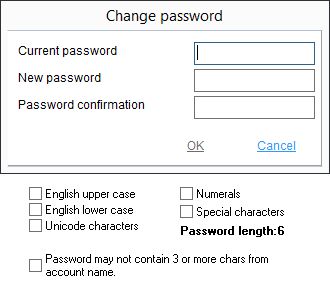
4)Enter the provided one-time password in the Current password field and the new password in the New password and Password confirmation fields. Then click OK. The password has now been changed.
Resetting a Password
1)Go to Administration/General/User. Select the user whose password you want to reset and click on Edit.

2)Click on Reset password. A message showing the one-time password displays:
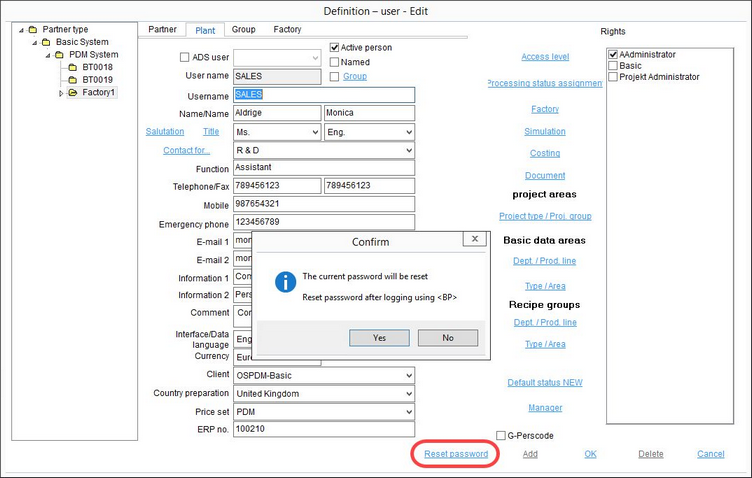
3)Confirm by clicking Yes. When you log in using the one-time password, the following message displays:

4)When confirmed, the Change password dialog opens. Click outside the data-entry fields to display predefined password requirements. Password requirements can be specified via Administration/General/Password.

5)Enter the provided one-time password in the Current password field and the new password in the New password and Password confirmation fields. Then click OK. The password has now been changed.
