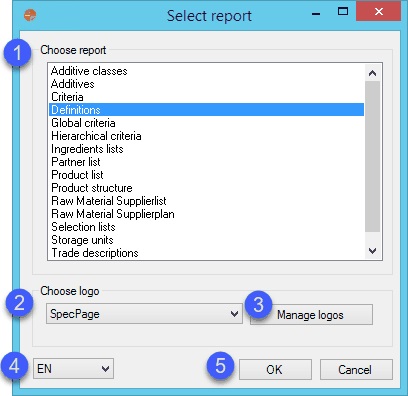
You can set up a logo for relevant reports in the main report selection dialog. This logo will be included in the selected reporting option.
1.Choose report: Select a reporting option from which you would like to obtain a report.
2.Choose logo: As previously mentioned, each report can include a logo. Select the preferred logo from the list of already existing logos.
3.Manage logos: Select this option to create/edit/delete logos. One of the created logos can also be set as default (shown below).
4.Language selection: Select the report language.
5.OK: Confirm your selection.
Cancel: Cancel report selection and close the dialog.
Managing Logos
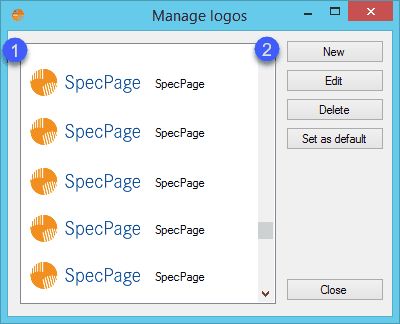
You can select the Manage logos button from the main Select report dialog to create/edit/delete logos. By doing so, the following dialog opens:

1.Select from the list of already created logos.
2.New: Insert a new logo. By selecting this button, the dialog Logo add/edit opens.
Edit: Edit the selected logo. By selecting this button, the dialog Logo add/edit opens.
Delete: Delete logo.
|
Important: Be careful when deleting logos as there is no confirmation dialog. |
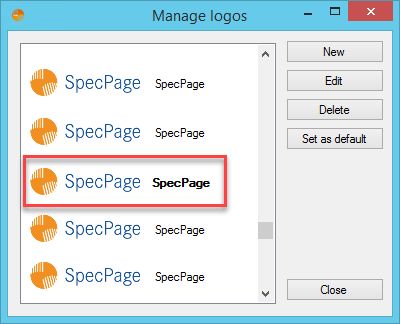
Set as default: The default logo appears in bold (shown below).
Close: Close the dialog.
|
Example of a logo set as default:
|
Adding or Editing a Logo
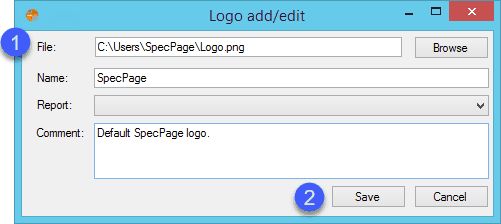
In the Manage logos dialog, you may add new or edit existing logos. This can be easily done in a few steps:

1.File: Select an image file from your computer to be used as a logo. You can type the file's location into the text box, or just simply press the Browse button and select your file. All logos are sorted alphabetically.
Name: Select a name for the logo.
Report: In case you choose a specific report from the list, the logo will be listed only for the selected report. To apply your logo to all reports, leave this option unselected.
Comment: Write a comment for the logo.
2.Save: Save all changes made to the logo.
Cancel: Cancel all changes.

