Each reporting option can be translated into a different language.
By taking localization into consideration, reports can be divided into two separate groups: reports without profiles and reports with enabled profiles. Each of these reporting options are treated differently, if the user decides to use the translation feature. The following paragraph will explain how the translation function operates in Reporting.
Translating a Report without Profiles
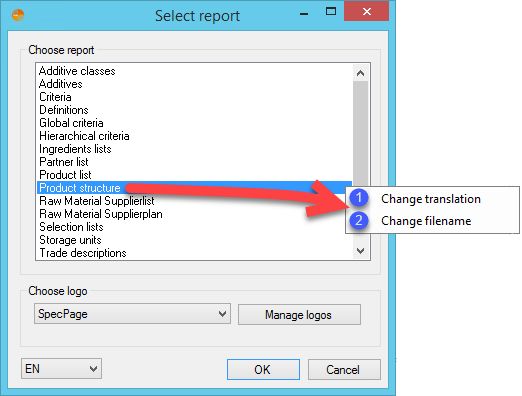
This context window provides access to the translation dialog which can be accessed by right-clicking on a selected reporting option:

1.Change translation: Selecting this option will open a new dialog called Translation manager. The way it functions is described further below.
2.Change filename: Selecting this option will also open a small Filename settings dialog window, in which you may modify the report's filename. For more information, see Reporting/Functions & Processes/Report Filename.
Translating a Report with Profiles Enabled
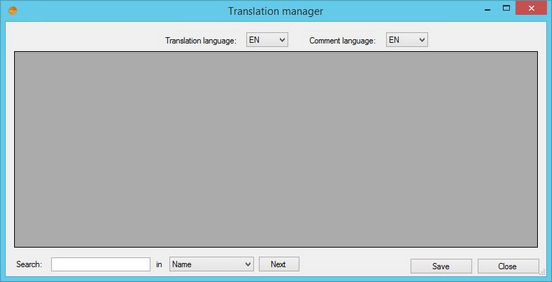
If you decide to translate a project that contains a profile, from the Select report menu, you will receive only an empty dialog:
This way, you can see directly whether the reporting option contains profiles, or does not have profiles enabled.
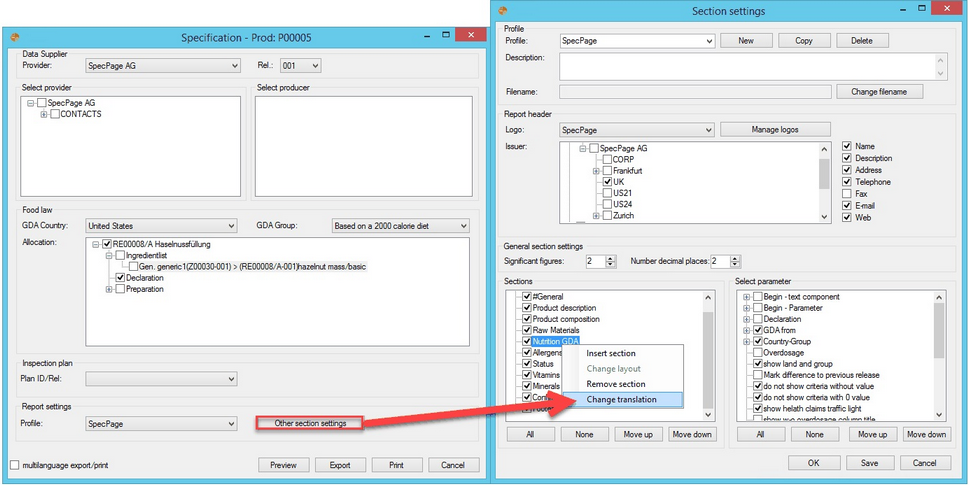
Reporting options with enabled profiles have to be localized part by part, by translating its separate sections (since each profile can have its own strings with texts).
To translate a section, select Other section settings from the main dialog and then right-click on a particular section and select Change translation. The way it functions is described below.
Translation Dialog
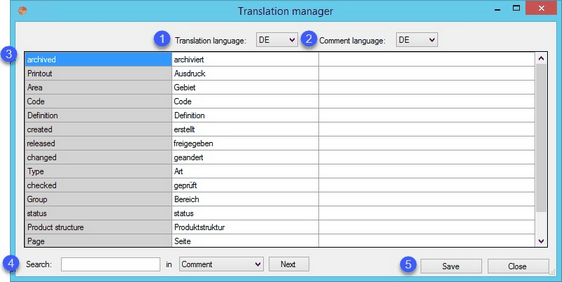
•After selecting the Change translation button, either for a report with or without profiles enabled, the following dialog will be opened.

1.Translation language: Select the language you want to translate the default strings to.
2.Comment language: Select the language in which you want to write a comment to a string.
3.Each of the rows contains a string with text. The three columns shown in the picture go as follows:
Left column (Name): Original strings.
Middle column (Translation): Strings for translation.
Right column (Comment): Strings for comments.
4.Search: Search for a phrase in Name, Translation, or Comment. Select Next to search for an adjacent entry of the searched phrase.
5.Save: Save translations/comments.
Close: Exit without saving.
|
Important: After entering a translation or a comment, be sure to click Save (5) before selecting a different language, otherwise your changes will not be saved. |

