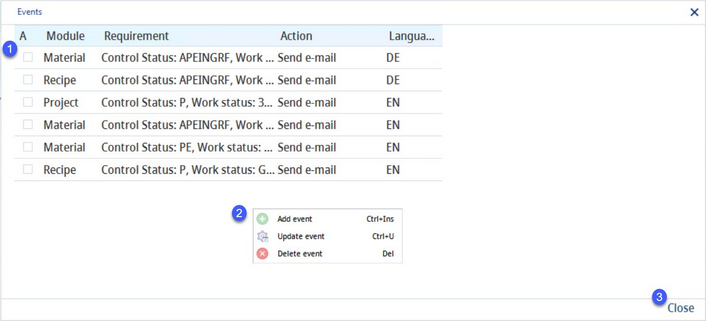
You can define and manage e-mail related events here. Events can be redefined and added, as well as updated or deleted.
1)A: Activate/deactivate the event by clicking the checkbox.
ID: The identification number associated with the event.
Subject: The subject of the event.
Module: The relevant module for which the event has been defined.
Requirement: The description of the requirements that have to be met in order to execute the action.
Action: The action to be carried out once the requirements are met.
Language: The language of the event.
2)Right-clicking the Events dialog opens a context menu with the following options:
Add event: Opens an empty Event detail dialog to define and assign a new event.
Update event: Opens the Event detail dialog of the selected event.
Delete event: Delete the selected event. A confirmation message is displayed.
3)Close: Close the dialog.
Event Detail
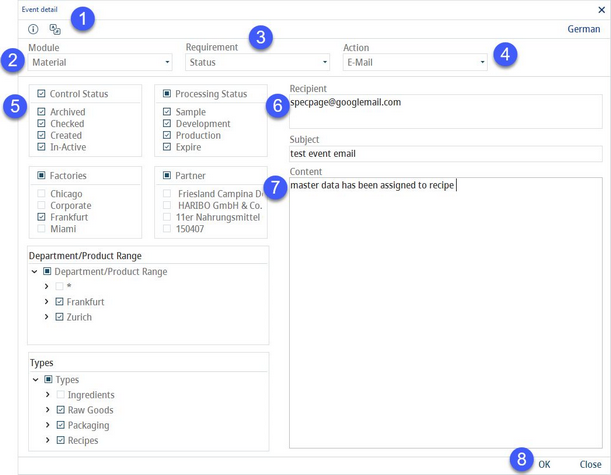
1)The dialog hint: Hovering over this icon provides instructions on how to use the dialog.
Language: Switch between data languages.
2)Module: The module selection. A module can be selected only when creating an event and cannot be updated later.
3)Requirement: Select requirement type. Requirement can be selected only when creating an event and cannot be updated later.
4)Action: Select type of action to perform once all the specified requirements are met. Action can be selected only when creating an event and cannot be updated later.
5)Requirements options: Specify the control status, processing status, departments (factories), department, and its Product lines and types of Master data or recipes.
6)Recipient and Subject: Enter the email recipient's address as well as the subject of the email. You can use multiple email addresses separated by comma or semicolon.
7)Content: Fill in the subject of your e-mail and compose the message. Click on the i icon to display the list of data that will be acquired from the system.
8)OK: Confirm.
Close: Close the dialog.
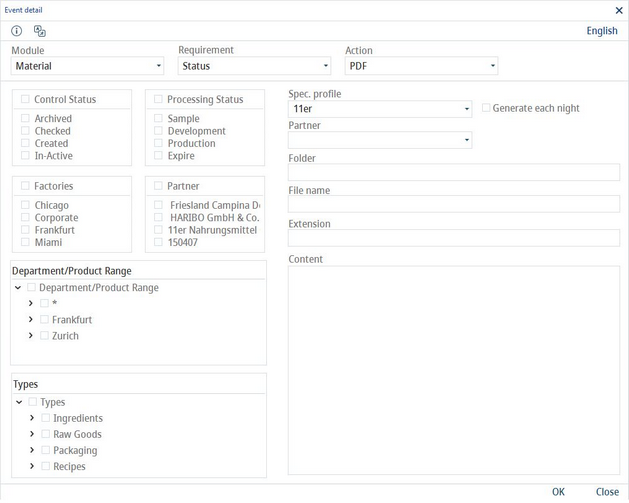
If the action selected (labelled 3) is PDF, specify the requirements, select specification profile (= reporting profile created for Master data specification), specify the folder for saving the output file, and give the file a name and extension (.pdf by default). Compose the message and click OK to confirm.
A special event for generating a PDF report on a cloud repository is available under module Recipe and action PDF to SharePoint. The reports, that need to be designed by our team, are automatically stored on a cloud drive in folders that correspond to the product structure (type, area, group) of the source product. The creation of the PDF file is triggered by the Commit to Master data function.

|
Note: In case you are interested in using this feature, please contact SpecPage and we will provide you with more information and assist you with the additional configuration that is required. |


