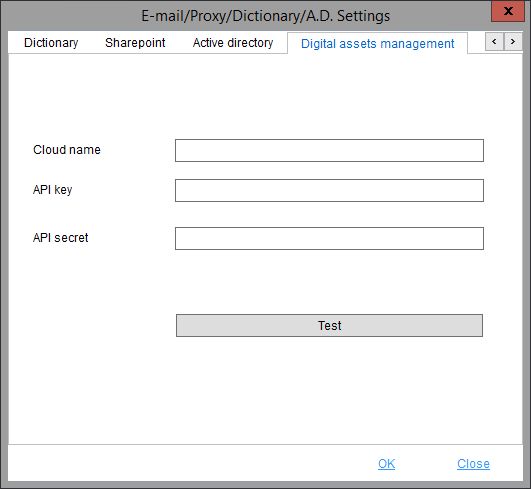
The following services can be configured in this dialog:
E-mail Settings
Basic settings for e-mail functionality within SpecPDM.
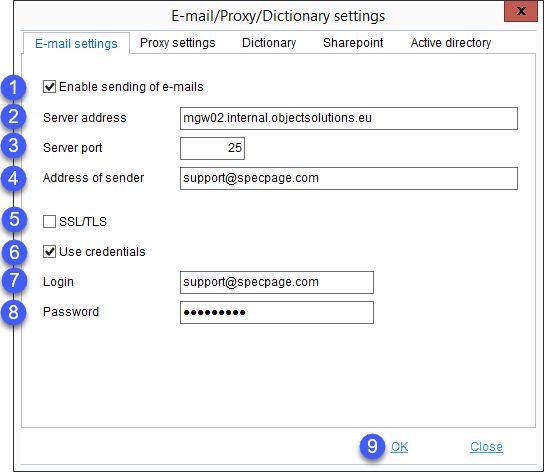
1.Enable sending of e-mails: Turn outbound e-mails on.
2.Server address: Information provided by the service provider.
3.Server port: Information provided by the service provider.
4.Address of sender: The E-mail address used for incoming emails.
5.SSL/TLS: Internet communication security protocols. Information provided by the service provider.
6.Use credentials: Enable e-mail login.
7.Login: E-mail login name (address).
8.Password: E-mail login password.
9.OK: Confirm settings.
Close: Close the dialog.
Proxy Settings
Proxy server address and login details.
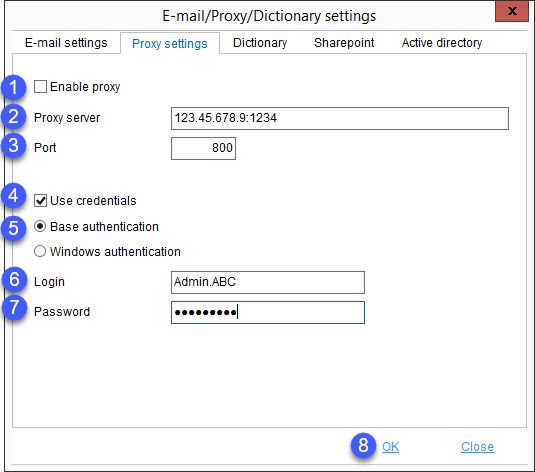
1.Enable proxy: Select this checkbox to allow SpecPDM to use proxy settings.
2.Proxy server: The proxy server address.
3.Port: The proxy server port.
4.Use credentials: Select this checkbox to enable authentication.
5.Base authentication/Windows authentication: Select between these two authentication types.
6.Login: The user name for the selected authentication.
7.Password: The password for the selected authentication.
8.OK: Confirm settings.
Close: Close the dialog.
Dictionary Settings
When creating a new trade name, one of the options for translations is using a dictionary. Define dictionary access settings here.
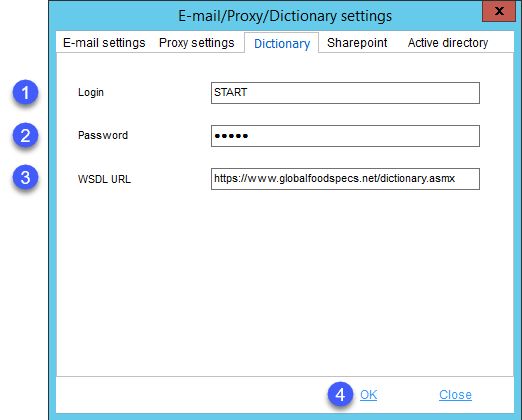
1.Login: Service user name.
2.Password: Service password.
3.WSDL URL: URL address of the Web Services Description Language dictionary services. By default, one is already predefined.
4.OK: Confirm settings.
Close: Close the dialog.
SharePoint Settings
Connect SpecPDM with your SharePoint account.
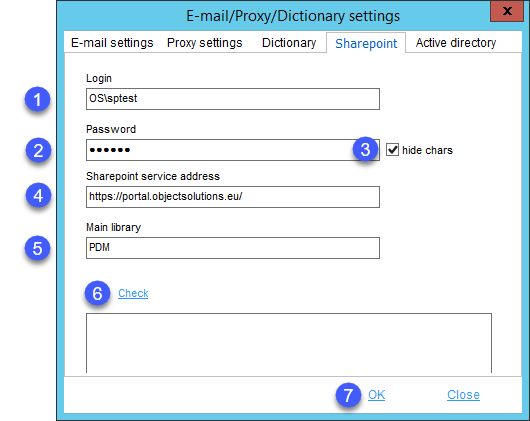
1.Login: The SharePoint user name.
2.Password: The SharePoint password.
3.Hide chars: Hide password characters.
4.SharePoint service address.
5.Main library: The name of the library (storage place) on SharePoint, where your files are stored.
6.Check: Initiates a test of the configured SharePoint connection. The results will be displayed in the field below the button.
7.OK: Confirm settings.
Close: Close the dialog.
Active Directory
Configure Active Directory service.
This is an interface to a local company's Active Directory system. PDM groups have to match AD groups. Both groups have to be created in both systems.
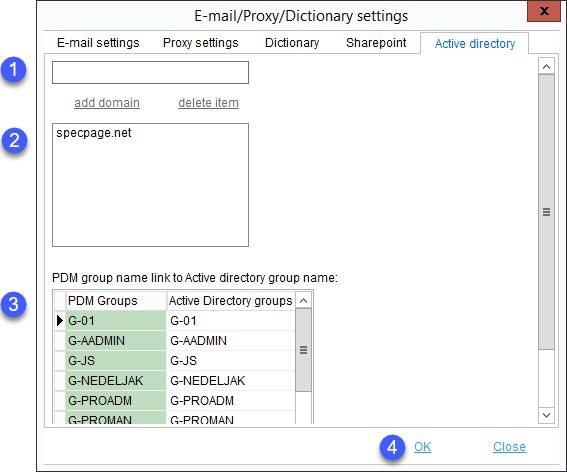
1.Enter the Active Directory domain address and click Add domain to add it to the list of domains.
2.The list of domains. If you want to delete a domain, click on it and select the delete item button.
3.Active directory groups: Each group in Active Directory must be connected to a SpecPDM permission group. Active directory groups are given. PDM permission groups can be created and paired with Active Directory groups.
4.OK: Confirm settings.
Close: Close the dialog.
Digital Assets Management
SpecPDM supports attachments stored on a Cloudinary cloud server. Enter the API settings available in your Cloudinary account in section Dashboard/Account Details. You can then press Test to test the connection. For more information about working with attachments, see General Information/Managing Attachments.
