It is possible to attach files, such as images, certificates, laboratory results, etc., to various objects in SpecPDM. The procedure is always identical. The attachments can be opened directly from the Documents section or downloaded to your local disk. All documents are subjected to the same data control principles (i.e. control and processing statuses) as any other data objects available in SpecPDM. This article contains the following information:
Attaching documents
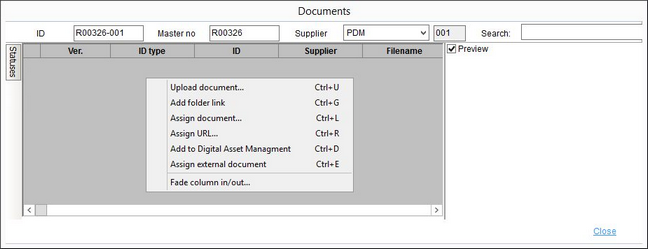
When the Documents dialog appears, choose how you would like to assign the document. Right-click and select one of the options:
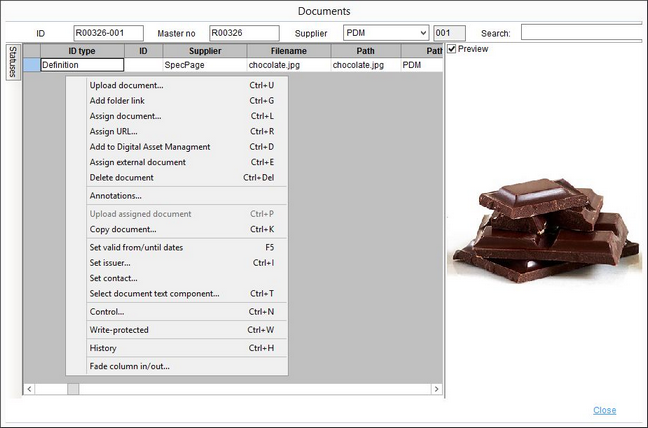
Right-clicking in the Documents section of the screen brings up the following context menu:
•Upload document: Attach a file to your project in SpecPDM.
•Add folder link: Insert a link to a folder.
•Assign document: Assign a file which will not be uploaded to SpecPDM, but will be stored locally.
•Assign URL: Type a URL that will open in your default web browser on double-click.
•Assign to Digital Asset Management: Use attachments stored on Cloudinary cloud storage service. The connection has to be established by entering your Cloudinary API details in Administration/General/Email/Proxy/Dictionary settings.
•Assign external document: Enter information about a file that is not directly accessible.
•Fade column in/out: Show or hide columns. It is also possible to rename columns by double-clicking on their name.
When you have already uploaded at least one document assigned/uploaded to your project, the following extra options will be displayed in the right-click context menu:
•Delete document: Remove the selected attachment from your project.
•Upload assigned document: Upload the assigned file (see above) to SpecPDM.
•Copy document: Make a copy of the file. This requires a new file name.
•Set valid from/until dates: Set the validity of the document from a calendar.
•Set issuer: Select an issuer from Administration/General/Partner structure.
•Set contact: Select a contact person from Administration/General/Person.
•Select document text component: Select a text component in the column Comment. See article General information/Using Text Components for more information.
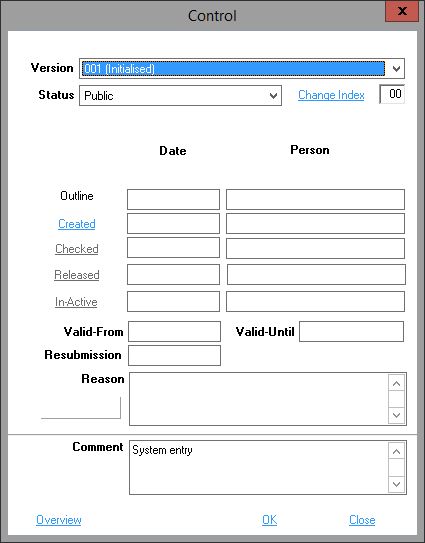
•Control: Change the statuses of the file. You can learn more in the section of this document called Document data control.
•Write-protected: Disables certain editing options (e.g. deletion, validity, etc.).
•History: View the history of detail changes of individual attachments.
Downloading documents
One way to save documents from SpecPDM to your local disk is to open the file in an external application and save its copy using this application. However, there is an easier and quicker way to save the files directly from SpecPDM.
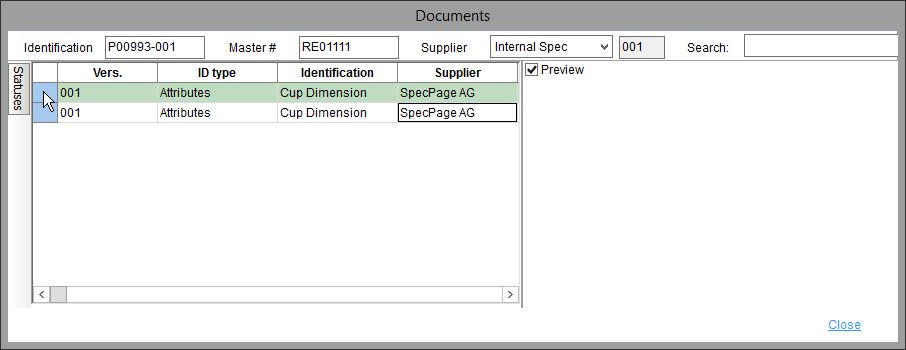
First, select a file you want to save. Click in the first column, the entire line will become highlighted. Press key combination Ctrl+C, navigate yourself to the place where you want to save the file (e.g. your desktop, folder, etc.) and press Ctrl+V or choose option Paste from the context menu.
|
Important: Do not close the Documents window before pasting the file – it would trigger an error! |
Document data control
You can change the control and processing statuses of individual attachments via the control panel available in the right-click context menu. This opens the standard Control dialog. For more information on using the data control system, see General Information / Data/Document Control.
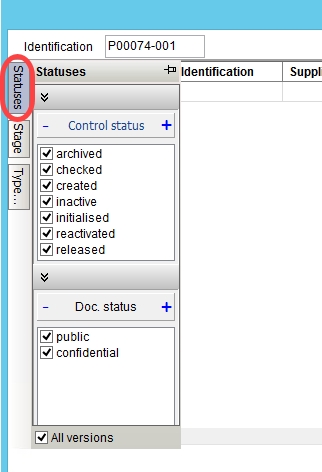
You can filter the attachments according to their control and processing status. If you do not see the attachment you have uploaded in the list, you may first need to check if the Statuses filter on the left side of the window is adjusted correctly.
You can pin the Statuses panel to make it always visible.

