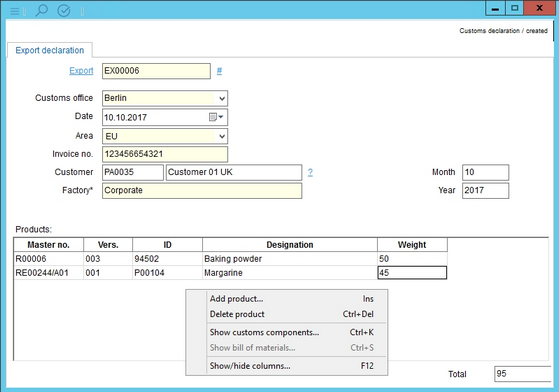
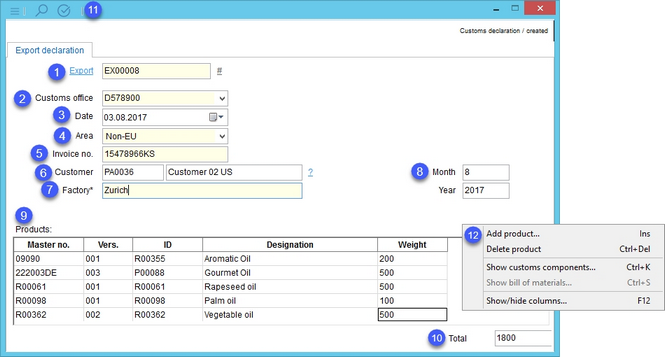
Using the Export declaration tab, you can create export declarations for concerned products.
1.Export: Select from existing customs declarations or click the # icon to create a new one.
2.Customs office: Enter the relevant customs office's name or code.
3.Date: Select the declaration date. You can type the date in or use the calendar.
4.Area: Select the applicable area. Available areas can be defined via selection list CA.
5.Invoice number: Enter the invoice number.
6.Customer: Enter the customer's ID or name and press Enter. Eventually, click on the ? button to select the customer from the partner structure.
7.Factories: Select the relevant factory.
8.Month/year: Information based on date assignment.
9.Products: The products included for customs declaration. Enter their total weight in the relevant column. See section Adding Products for Declaration at the end of this article for more information.
10.Total: The total weight of all selected products.
11.Quick access toolbar
![]()
|
Window options (e.g. minimize, maximize, move, etc.). |
|
Select an existing export. |
|
12.Right-click on one of the products to display a context menu with the following options:
Add product: Insert a product (Master data object).
Delete product: Remove the selected product from the list. You will be prompted to confirm this action.
Show customs components: Load information defined in Master data/Customs info.
Show bill of materials: Display a bill of materials for Master data objects that have been created from a recipe, using the assignments. For more information about bill of materials, please see Recipe/Bill of Materials.
Fade column in/out: Show or hide columns. It is also possible to rename columns by double-clicking on their name.
Adding Products for Declaration
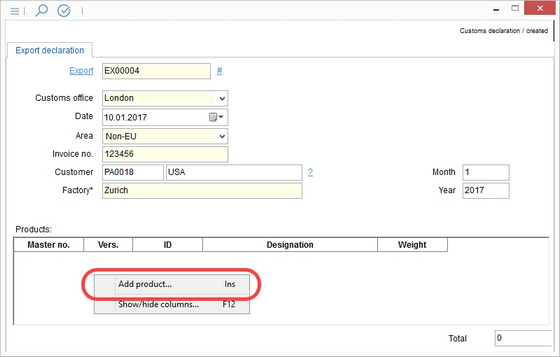
1.To add a product to your declaration, right-click in the products section and select Add product.
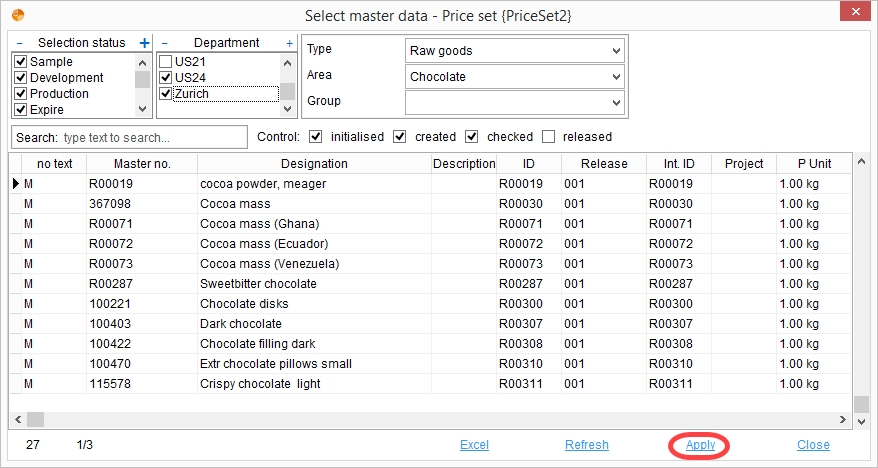
2.In the Select Master data dialog that opens, choose the appropriate price set via right-click → Select price set. The currently used price set is displayed in the title bar. For more information about price set, please see Recipe/Functions & Processes/Using Price Sets.
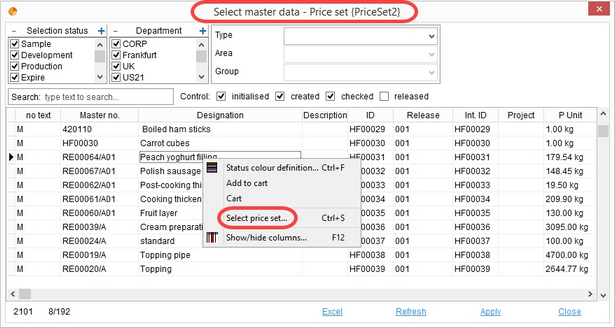
3.Apply various filters (status, department, product structure) or use the search function to find the Master data object you want to add to the list of products.
4.Double-click on the object from the list of results or select the object and click Apply.
5.The object will be added to the list of products to be declared. If you want to delete the product from the list, use right-click and select Delete product. You can also select Show bill of materials to display the bill of materials from Recipe/Bill of materials (this option is available only for Master data objects created from a recipe with defined bill of materials).
