After creating a recipe, it can be transferred directly to Master data. This purpose is defined in the Assignments dialog. You can assign different markets or customers to a recipe. Thus, you can transfer a particular customer specification to the receiving Master data object (semi-finished product, finished product).
An assignment can be provided automatically, through a program parameter setting while creating a new recipe variety. The following data items are populated: Master No. (formed from recipe/var.ID), person, date.
1.Assignment identification: Market, Customer, Manufacturer, Master no., ID/Version and Partner.
2.Updated: Mark if you want to automatically apply any changes from the the recipe to the assigned object(s).
T: Select for targeting.
3.Rec. no.: This custom field has no special function and can rather be used for internal records.
Alternative: You can use this custom text field to enter an alternative number or any other information.
4.Assignment details: Product name, Filling, BBD (best before date), and BBD unit.
Note: Use this field to enter your own note.
5.Copy Master data, Copy partner, Copy template: Select a source for copied template data takeover. Click on Source for copy template from the right-click context menu. Select the Master data object for data takeover and use the drop-down list to specify the copy template to be applied. SpecPDM takes information from the latest released version of the object and in case it has not been released, than from the unreleased version. The data will be copied from the selected Master data object using the copy template settings defined via Administration/General/Templates manager. The data takeover occurs when the recipe is committed to Master data. For more information, please see Recipe/Functions & Processes/Commit Recipe to Master data.
6.Ingredients list, Declaration, GDAs, Allergen list: This information can be assigned to the recipe via Declaration/Assignments. See the respective article for more information.
7.Date, Person: Indicates when and by which user was the assignment created.
8.Search name: The custom name that can be used for search purposes. This can be defined in Master data/Definition.
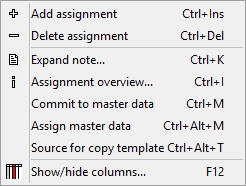
9.Right-click context menu:

|
Add assignment: Insert a new line for assignment. |
|
Delete assignment: Delete the selected line. |
|
Expand note: Use expanded view to see/edit the entire note (8). |
|
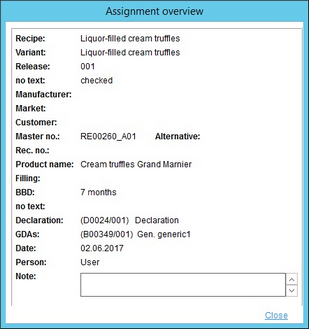
Assignment overview: Shows all the details in a compact view. |
|
Commit to Master data: Transform the recipe into a new Master data object by defining the data to be transferred in dialog Recipe to material - configuration. For more information, see Recipe/Functions & Processes/Commit to Master data. |
|
Assign Master data: Creates a link between the recipe and an existing Master data object. The recipe will become the assigned Master data object's original recipe. |
|
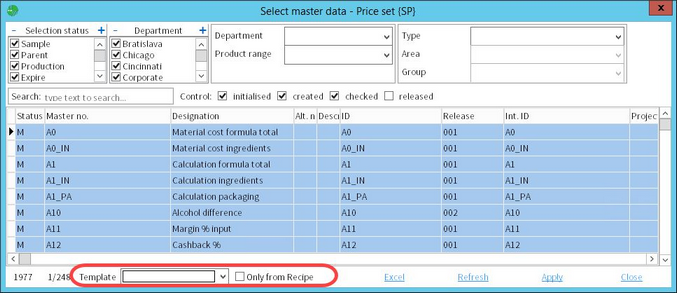
Source for copy template: Select a source for copy template data takeover. A standard selection dialog opens. Select the copy template from the Template drop-down list and choose a Master data object as the source for the data copy. You can select the Only from Recipe checkbox to display only Master data components of the recipe. Copy templates can be created via Administration/General/Templates Manager. |
|
Fade column in/out: Show or hide columns. It is also possible to rename columns by double-clicking on their name. |


